ARM SATA Sanitization AppNote
Edit this on GitLab
AppNote – ARM SATA Sanitation (Peta Linux)
NAI Generation 5 ARM processor products (75ARM1, 64ARM1, 68ARM1, NIU1A) have SATA Flash for customer application use. In some instances, there may be a need to sanitize (or erase) the contents in SATA so all the residue data on the SATA drive is wiped clean.
After the SATA flash is erased, the BSP image needs to be re-installed in order for the board to be useable. Note the BSP image for each of the products listed above is different. For illustration purposes, this document will refer to the 75ARM1 product.
SATA Sanitation
The following software applications (or equivalent) are needed to sanitize SATA and reformat SATA after sanitization is complete:
Software Application |
Description |
Filename |
Tera Term |
Used for Serial communication between the host PC and the target |
teraterm-4.86.exe |
WinSCP |
Used for File transfer between the host PC and the target |
winscp576setup.exe |
fOp |
Used to sanitize SATA Flash. Note, the application source code (fOp.c) is provided for reference |
fOp |
xxd_arm |
Used to view data on SATA Flash |
xxd_arm |
fdisk |
Used to format SATA flash |
fdisk |
1.1 Connect to Board
Using Tera Term (or equivalent application), connect to the target board with the following settings:
Speed |
115200 |
Data Bits |
8 |
Stop Bits |
1 |
Parity |
none |
Flow Control |
none |
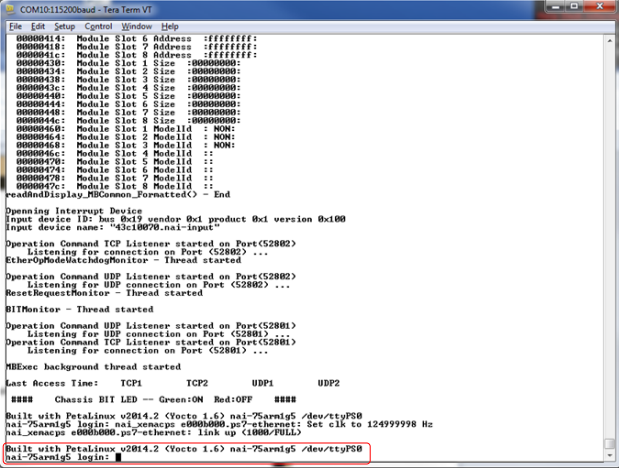
After powering up the board, you should see the Log-in prompt (refer to Figure 1).
1.2 Boot from QSPI Image
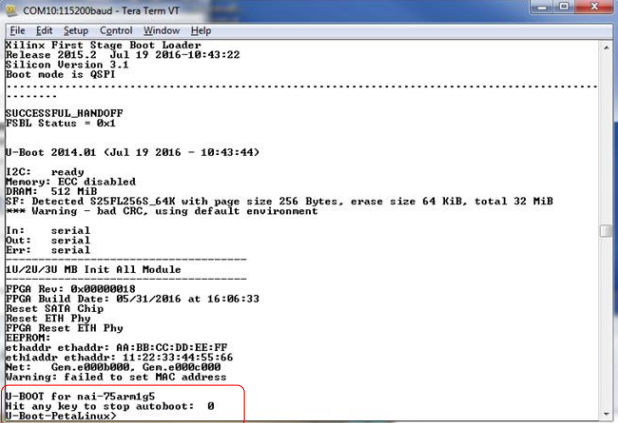
Cycle power on the target board and interrupt the normal boot-up sequence by hitting the <Enter> key. You need to hit the <Enter> key within 2 seconds in order to interrupt the boot-up cycle before it boots from SATA. If you successfully interrupt the normal boot-up sequence (refer to Figure 2), you will see the UBoot prompt. Otherwise cycle power and try again.
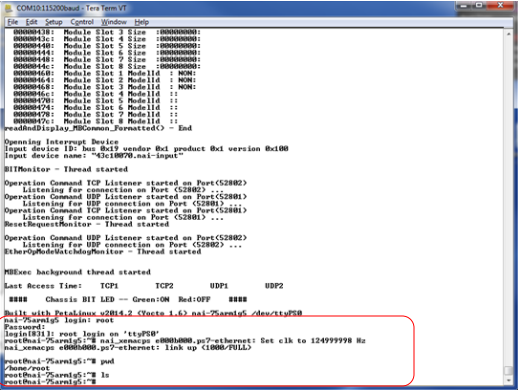
At the UBoot prompt, force booting from QSPI with the following command: 1. Type “run qspi_boot” Once Linux boots up, verify you can log-in to the target (refer to Figure 3). The default username is “root” and the default password for this username is “root”. Verify no files in root directory (refer to Figure 3) with the following commands: 1. Type “pwd” 2. Type “ls”
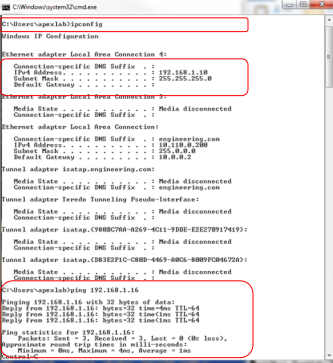
Verify that you can communicate to the target via Ethernet (refer to Figure 4). The default IP address and Subnet mask is 192.168.1.16 and 255.255.255.0 respectively.
1.3 Disable SATA Write Protect
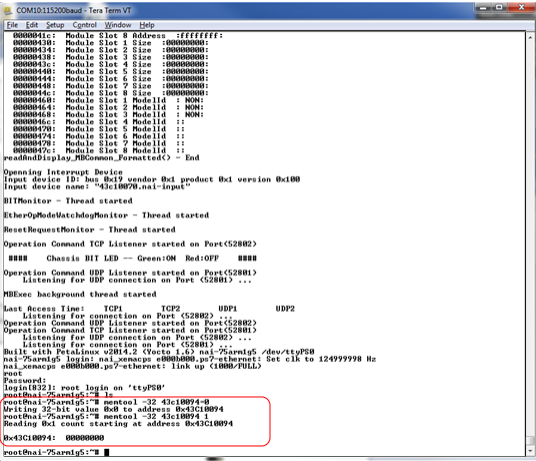
The SATA write-protect can be disabled by grounding the write-protect pin, or by the following commands (refer to Figure 5): 1. Type “memtool -32 43c10094=0” (0 will Disable Write-Protect) 2. Type “memtool -32 43c10094 1” (1 will retrieve the Write-Protect Value)
1.4 Transfer Files to Board
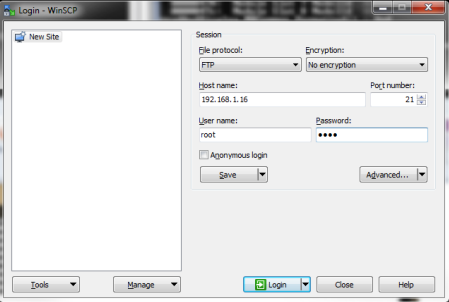
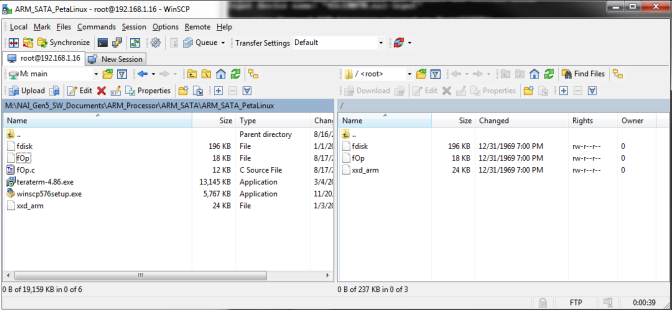
Using WinSCP (or equivalent application), connect to the board (refer to Figure 6), and transfer the following application files from the host PC to the board (refer to Figure 7). Note WinSCP will copy the files to the /var/ftp directory on the target. • fdisk • fOp • xxd_arm
Change the file operation privilege for the three application files with the following Linux commands: 1. Type “cd /var/ftp” 2. Type “ls” 3. Type “chmod a+x *”
1.5 SATA File Descriptor and Size
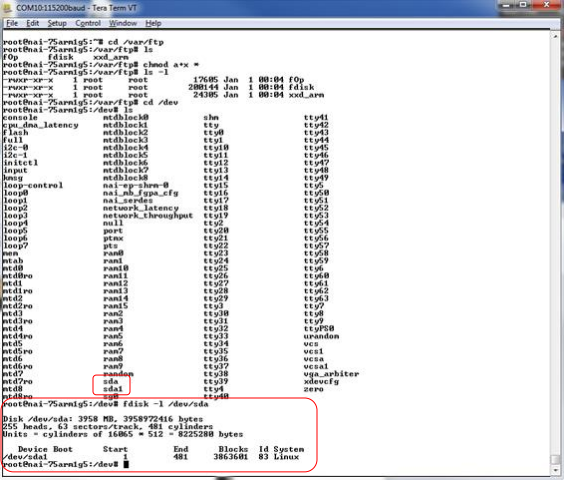
Determine the file descriptor and size of SATA with the following Linux commands (refer to Figure 8): 1. Type “cd /dev” 2. Type “ls” 3. Type “fdisk –l /dev/sda”
1.6 Sanitize SATA
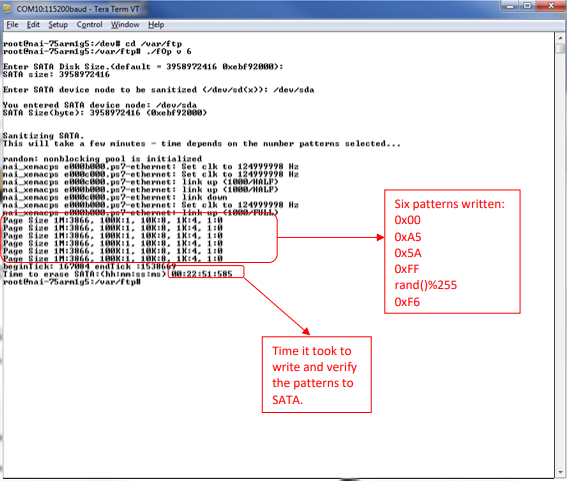
Sanitize SATA with the following commands (refer to Figure 9): 1. Type “cd /var/ftp” 2. Type “./fOp v 6” • v indicates a “write and verify” data operation • 6 indicates the number of data patterns to use to sanitize SATA. The maximum number of patterns is 6 with the pattern order as follows: i. 0x00, ii. 0xA5, iii. 0x5A, iv. 0xFF, 8 v. rand()%255, and vi. 0xF6. 3. When prompted, enter the size of the SATA drive. Use the default value of 3958972416 bytes by hitting the <Enter> key. You can also change it to another size. 4. When prompted, enter the SATA device node: “/dev/sda” 5. Each SATA write and verify pattern takes approximately 4 minutes. The time to complete SATA sanitization will take longer if more data patterns are specified.
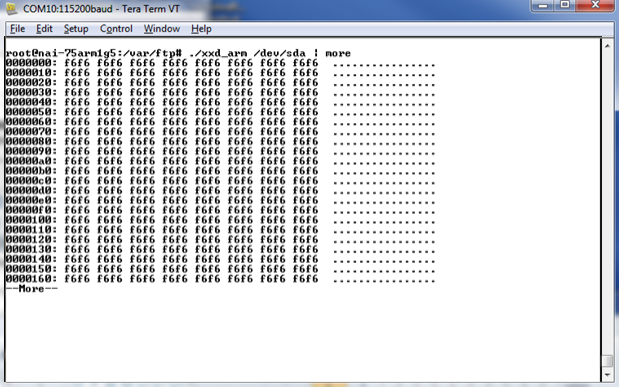
Verify the data in SATA with the following command (refer to Figure 10). Note, the data is 0xF6 since pattern 6 was the last pattern written. 1. Type “./xxd_arm /dev/sda | more”
2 Restoring SATA BSP Image
After the SATA flash is sanitized, SATA needs to be formatted and partitioned, and the BSP image needs to be re-installed before the board is useable.
2.3 Transfer BSP Image to Board
Using WinSCP (or equivalent application), transfer the BSP image file for the board from the host PC. Refer to the instructions in Section 1.4.
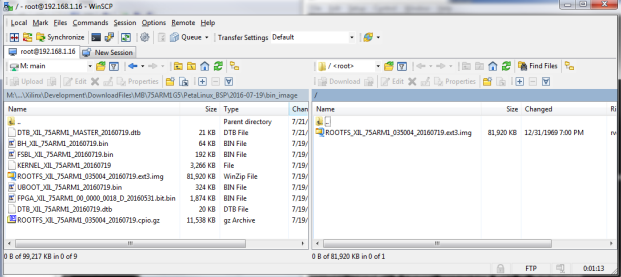
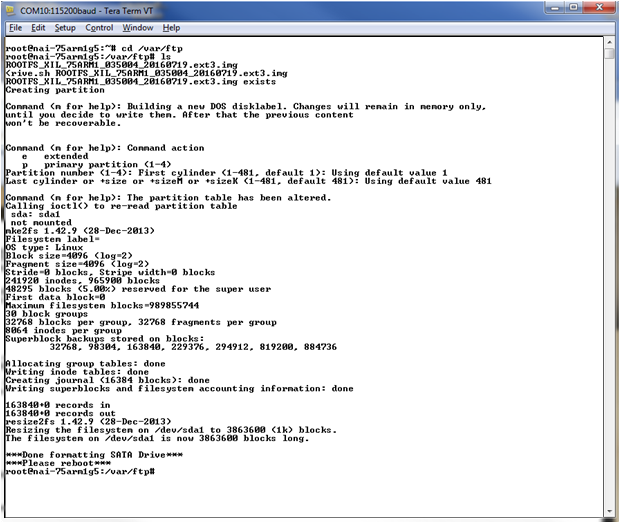
Run the following commands to re-format SATA and install the BSP image (refer to Figure 12): 1. Type “cd /var/ftp” 2. Type “ls” 3. nai_format_sata_drive.sh ROOTFS_XIL_NIU1A_VERSION_INFO_ext3.img
