Embedded Soft Panel 2 Quick Start Guide
Edit this on GitLab
Overview
The Embedded Soft Panel is a powerful GUI that allows users to configure and operate NAI hardware. It can also be used before receiving you have any hardware to understand functionality and jump start code development.
Within the Embedded Soft Panel the API Logger tool allows users to generate and record API calls via the GUI. This process converts your interactions while configuring and operating your hardware via the GUI into useable code.
Getting Started (Simple)
Step 0: Connecting to the Board
Refer to the Board Access Guide for help with this step.
Step 0.1: Downloading the Embedded Soft Panel
First click here to download the Embedded Soft Panel
Launch the ESP by finding the following application in the main folder.

Step 2: Number of Boards
A new tab will be opened called “Simple Configuration Menu”. Here, select the number of boards that will be connected to.

Step 3: Select Board(s)
Select the board (indicated at the top by “Board: #”) type connected to computer.

Step 4: Choose Connection
Select method of connection to board or system. Connection type will affect subsequent next steps.

Step 5: Onboard Ethernet
Choose ethernet protocol, IP-address and port number assigned to specified board.

Getting Started (Advanced)
Step 1: New Config
Select “New Configuration (Advanced)” from the Home Menu.

The Advanced Config works similarly to the Simple Config but the settings you need appear on one screen. The UI elements are editable either as dropdowns/combo boxes or text boxes.

Step 2: Connection Settings
Click the Connection Settings combo box and pick the board opening connection method.

Each connection type may have different options. For example, Native PCI bus has Lane/Bus/Dev/Func instead of an IP address.

Master Slave opening methods have the board index 0 as the master and any subsequent boards are slaves. For Ether Master Slave Native PCI Bus, the slaves open as PCI and therefore it is selected already for you and the unneeded UI elements are disabled.
To add more boards, the top arrow points to a spinbox, the up button will add another board to the bottom and the down button will delete the bottommost board.

The bottom arrow points to the minus, up, and down buttons. The minus will delete the board in the row and the up and down are used to move the board in the selected row either up in the list or down.
Step 3: Fill Configuration Settings
Fill the configuration with the necessary settings for your board based on the connection type. In this example I am opening a single board using Onboard Ethernet. It is a 75G5/75ARM1 with UDP, port 52801, and IP address 192.168.1.16.

Step 4: Select Configuration Option

The Configuration or Config is the current settings that your Advanced Configuration is set to. There are a few ways to utilize this config.
Save Config Opens a file explorer dialog allowing you to save this config as a text file. This is useful if you plan to use these same board opening settings many times and don’t want to re-type it.
Load Config Opens a file explorer dialog allowing you to load a previously saved config. The file will be read and the Advanced Configuration will fill with the information from the text file. The Load Configuration Advanced page on the home screen is the same as this button.
Open All Boards Opens all of the boards listed in the config and all of the modules on the boards, one by one in order.
Open Board Configuration Scans the boards, finding all the modules on the boards and then opens a dialog asking which modules you’d like to open. The ones that are checked before clicking OK will be the ones that get opened. In this example, only the DA3 will open once I press OK.

Open Board Addresses Shows the board addresses for slave cards. Only works with a proper master/slave board config.
API Logger
All API calls are automatically stored in .txt files located in the same folder as the application. These can be read using the “Refresh” button and by selecting the appropriate “Log Page”. API log files are divided based on file size so more recently updated .txt files contain recent API calls made by the application.

Home Menu / Dock Widgets
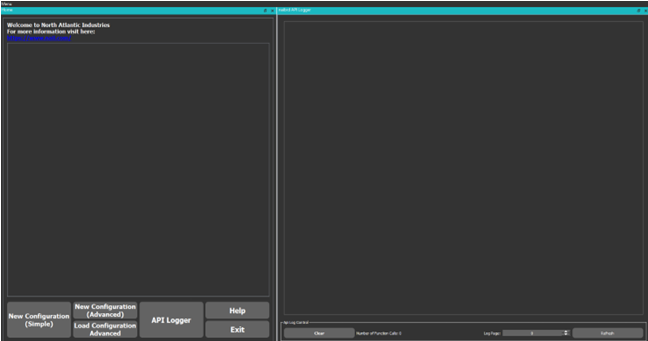
In the Main Dock Widget, the home menu will be open at the very start of the QT application.

Menu
The main dock widget contains a Menu bar that will allow you to navigate and open windows associated with the pushbutton options on the bottom.
The menu options in menu bar are functionally the same as the button options on the bottom and are provided for easier navigation.
The menu options will open/reopen the designated window or move to the tab of the designated window if it is already open.

You can change your display settings in the menu into 2 different modes: light and dark mode which are both color-blind safe. (Default is dark)
Dock Widgets

The Dock Widgets will allow you to tabify any number of windows as well as split the tabified widgets whenever you want.

The Dock Widgets will allow you to move the windows around freely (top, bottom, left, right) to a certain extent and will snap and resize the windows accordingly if you hover in a position relative to the dock.

You also have the option of leaving the widget (window) “floating” and can drag the window to another monitor if you are operating on more than one screen.


