Running Applications from the Target
Edit this on GitLab
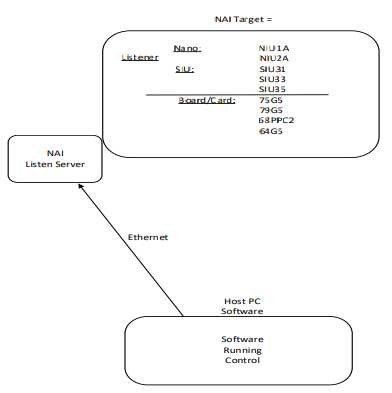
Connecting to a Nano
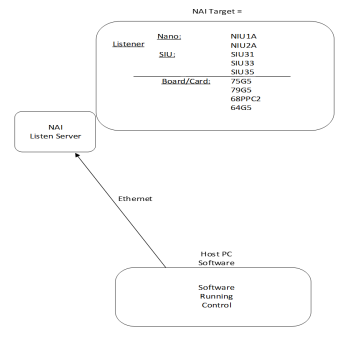
Running the sample application on a PC and communicating to the Nano via ethernet.
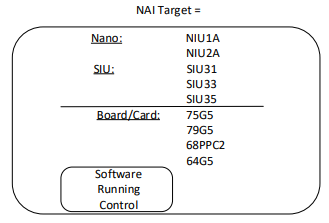
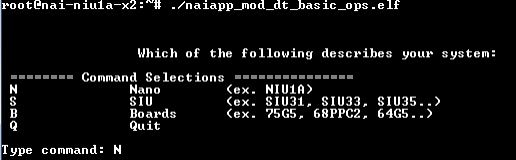
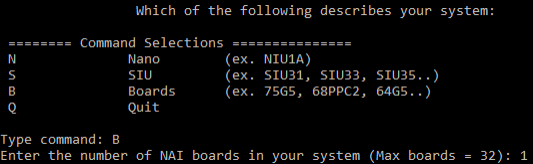
Type ‘N' to select Nano
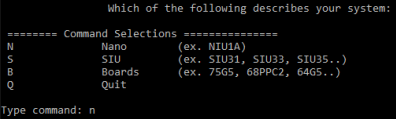
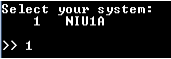
Type the number to select your system.

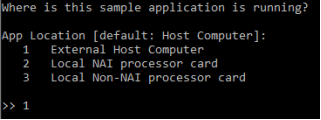
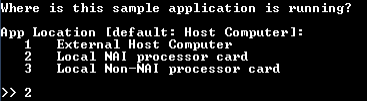
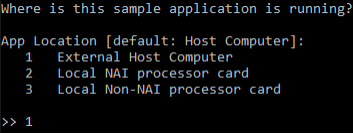
Choose the location of the sample application. In this case we are running this on a PC. Type ‘1' or just hit enter to select the default.
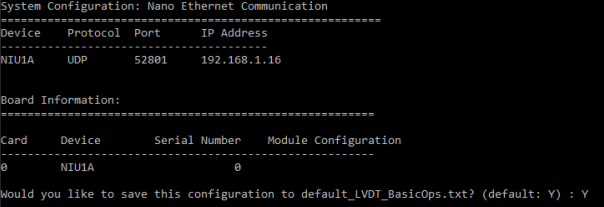
Type in the ethernet port number, port and IP address for the Nano. Hit enter to each prompt to select the default.

Once the ethernet connection has been established, a menu will be displayed, showing important information about the card and modules. You now how the option to save the configuration, this allows you to skip the previous steps for the next connection.
Running the Sample Application on the Nano (Onboard)
First give the executable proper permissions via chmod, ex. “chmod a+x NAME_OF_APPLICATION.elf”
Type the number to select your system.
Choose the location of the sample application. In this case the application is running on the NIU1A (a NAI processor card). Select 2.
Once connected you will see the board info printout and be asked to save the data input type Y to save or type N to not save. Saving allows you to open the device at the beginning of the program from now on.

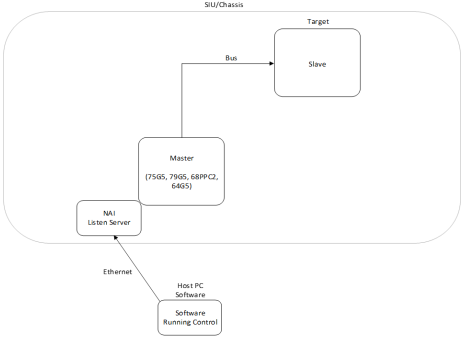
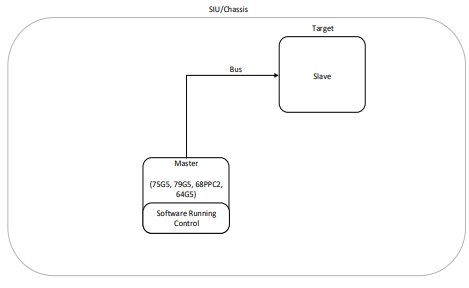
Connecting to an SIU
Connecting to master card via ethernet, salve cards over bus.
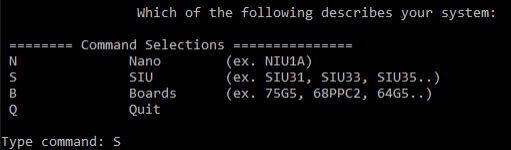
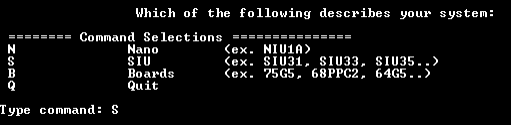
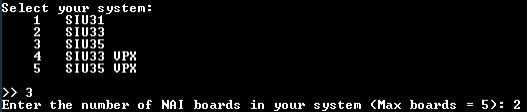
Type ‘S' to select SIU.
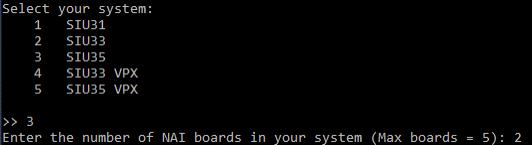
Type the corresponding number to select the SIU you are connecting to, then enter the amount of boards in your SIU.
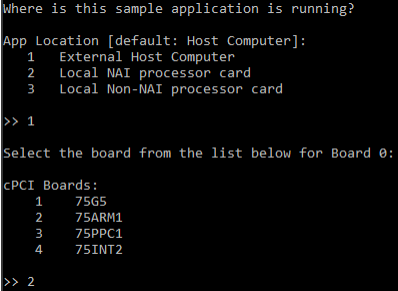
Choose the location of the sample application. In this case we are running this on a PC. Type ‘1' or just hit enter to select the default. Then select the master board (the one you are communicating to over ethernet).
Type in the ethernet port number, port and IP address for the master board. Hit enter to each prompt to select the default.

Type the corresponding number to select the device you are connecting to. Repeat for the number of cards in your system.
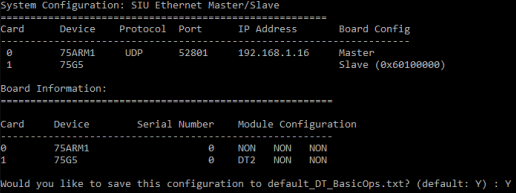
Once the master is connected via ethernet it will look on the bus for other NAI cards. This screen will be populated with the cards it finds and its modules. Type ‘Y' to save the configuration for later
Running the sample application on the master card, communication to slave cards over bus
First give the executable proper permissions via chmod, ex. “chmod a+x NAME_OF_APPLICATION.elf”
Type the corresponding number to select the SIU you are connecting to. Select how many boards are in your system.
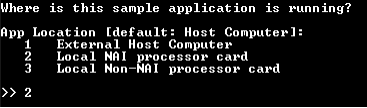
Choose the location of the sample application. In this case the application is running on the master card. Type ‘2'.
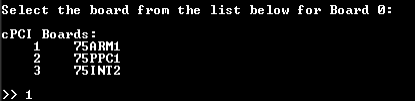
Type the corresponding master card your SIU has.
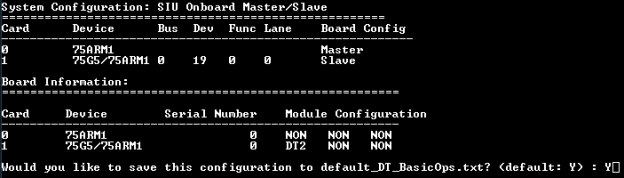
Once the master is opened it will look on the bus for other NAI cards. This screen will be populated with the cards it finds. Type ‘Y' to save the configuration for later
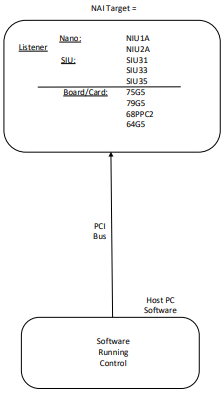
Connecting to an NAI Board
Running the sample application on a PC and communicating to the board via ethernet
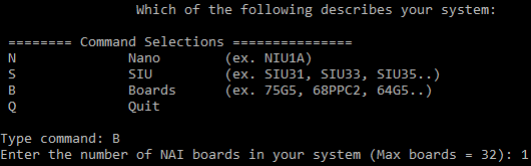
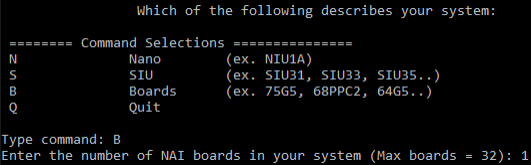
First give the executable proper permissions via chmod, ex. “chmod a+x NAME_OF_APPLICATION.elf” Type ‘B' to select boards. Type the number of boards that your system has.
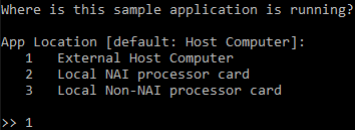
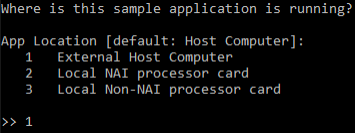
Choose the location of the sample application. In this case the application is running on a PC. Type ‘1' to select External Host Computer.
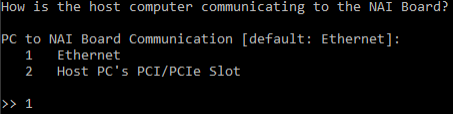
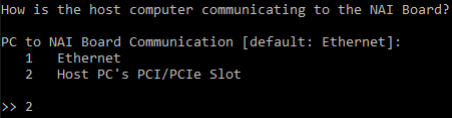
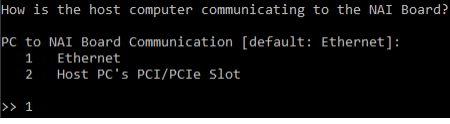
Choose the communication method to the target board. Type ‘1' to select the ethernet.
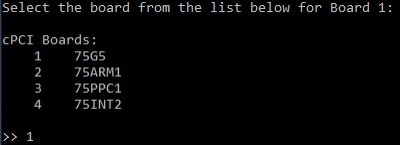
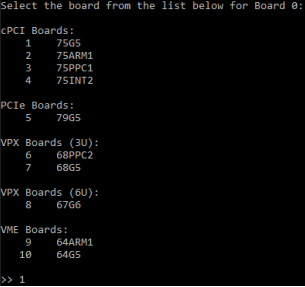
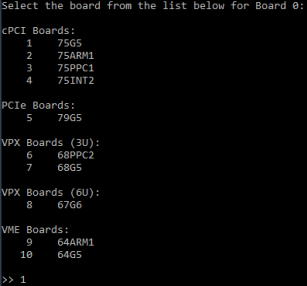
Type the corresponding number to select the type of board you are connecting to.
Type in the ethernet port number, port and IP address for the board. Hit enter to each prompt to select the default.

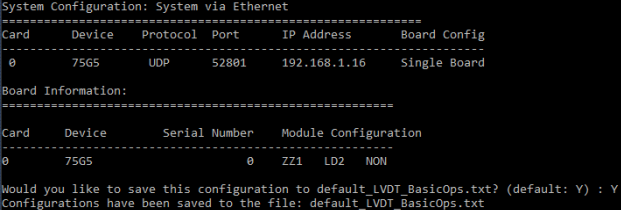
Once the card is connected via ethernet it will populate this screen with info about the card. Type ‘Y' to save the configuration for later.
Connecting through PCI to a board
To connect to your NAI Board type B in the command window.
Choose the location of the sample application. In this case the application is running on the host PC.
The communication from the host PC to the board is the PC’s PCI slot. Type ‘2'.
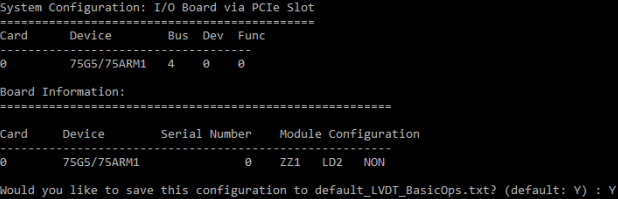
Once the card is opened this screen will be populated with the card’s information. Type ‘Y' to save the configuration for later.
Running the sample application on the board
First give the executable proper permissions via chmod, ex. “chmod a+x NAME_OF_APPLICATION.elf”
Choose the location of the sample application. In this case the application is running on the NIU1A (a NAI processor card). Select 2.
The communication from the host PC to the board is via ethernet. Type ‘1'.
Type the corresponding number to select the type of board you are connecting to.
Once the card is connected via ethernet this screen will be populated with information about the card. Type ‘Y' to save the configuration for later.

You are now done.